
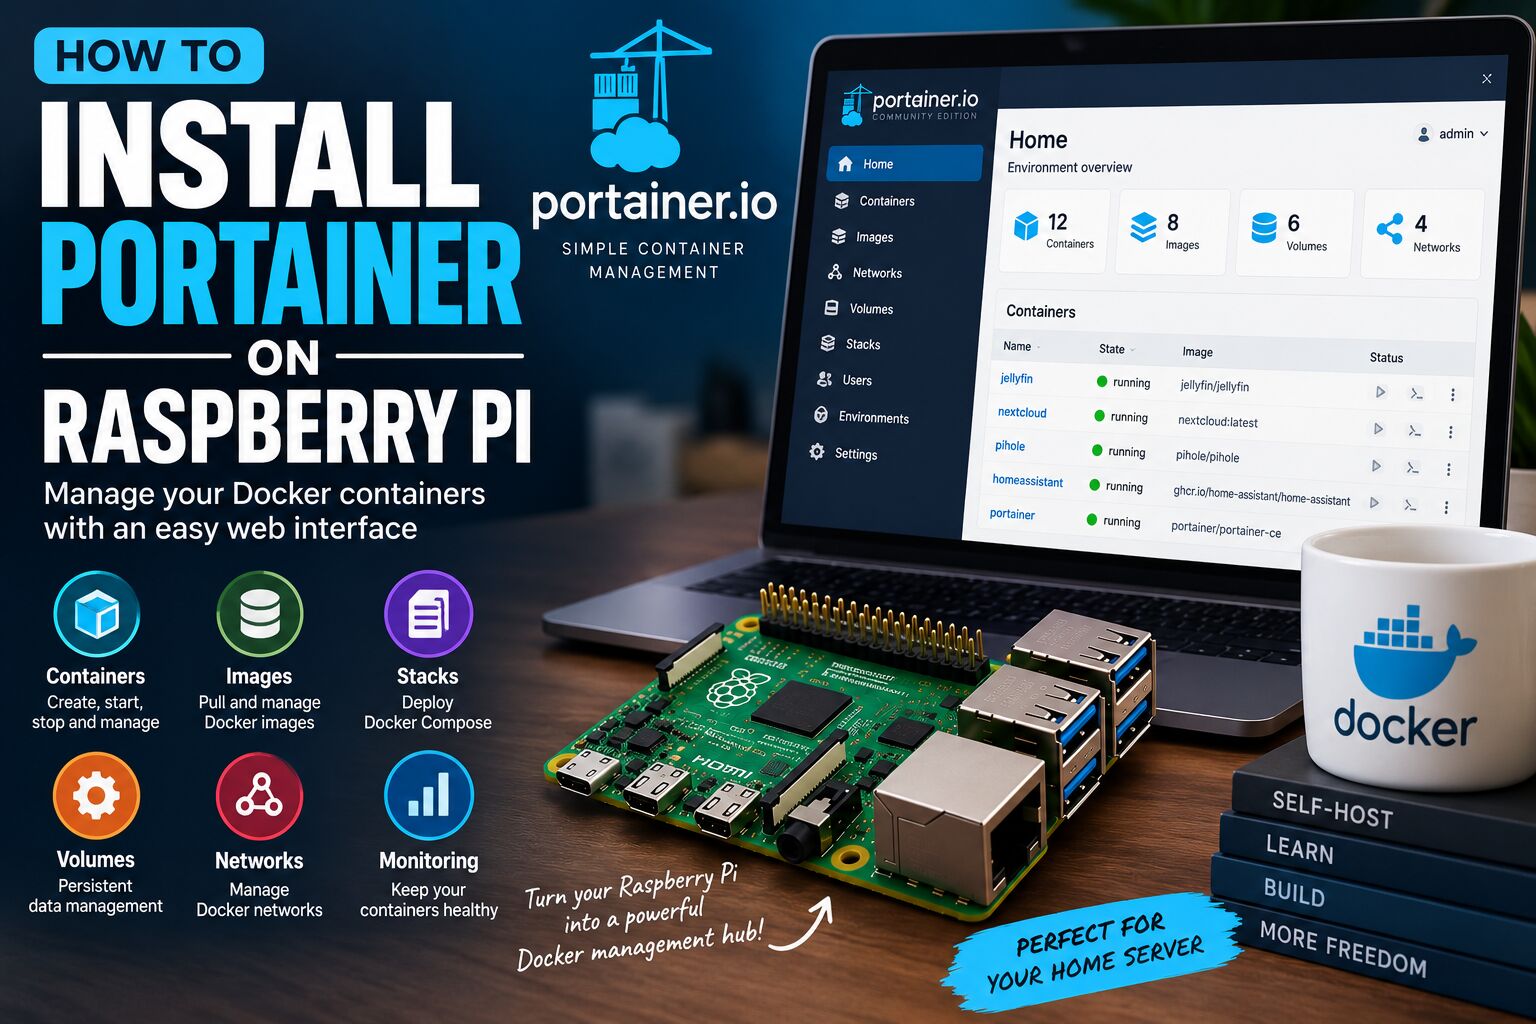
If you’re using a Raspberry Pi as a home server, Docker makes it possible to run applications such as Jellyfin, Nextcloud, Pi-hole, Home Assistant, Tailscale, and many other services in isolated containers.
The problem is that managing Docker entirely from the command line can become complicated.
That’s where Portainer comes in.
Portainer is a web-based management interface for Docker that lets you create, start, stop, update, monitor, and manage containers without having to remember every Docker command.
In this guide, you’ll learn how to install Portainer on Raspberry Pi, connect it to Docker, deploy your first container, manage Docker volumes and networks, and configure Portainer securely.
The instructions are designed for Raspberry Pi 4 and Raspberry Pi 5 running 64-bit Raspberry Pi OS.
What Is Portainer?
Portainer is a graphical management interface for container environments.
Instead of managing everything through commands such as:
docker ps
docker stop container
docker restart container
docker logs container
docker exec -it container bash
you can perform many of these tasks through a web interface.


A typical Raspberry Pi setup looks like this:
                  Raspberry Pi 5
                        │
                      Docker
                        │
                    Portainer
                        │
          ┌─────────────┼─────────────┐
          │             │             │
       Jellyfin      Nextcloud      Pi-hole
          │             │             │
          └─────────────┼─────────────┘
                        │
                   SSD Storage
Portainer doesn’t replace Docker.
Instead:
Portainer provides a graphical interface for managing Docker.
Why Install Portainer on Raspberry Pi?
Portainer is particularly useful when your Raspberry Pi is running multiple containers.
For example, you might eventually have:
- Jellyfin
- Nextcloud
- Pi-hole
- Home Assistant
- Tailscale
- Vaultwarden
- Nginx Proxy Manager
- Uptime Kuma
- AdGuard Home
Managing all these applications through the terminal can become tedious.
Portainer gives you a centralized dashboard.
Portainer Features
Portainer can help you manage:
- Containers
- Images
- Volumes
- Networks
- Docker Compose stacks
- Container logs
- Container consoles
- Environment variables
- Restart policies
- Resource usage
- Docker endpoints
You can also use Portainer to deploy applications from Docker Compose files.
Portainer Community Edition vs Business Edition
Portainer is available in multiple editions.
For a Raspberry Pi home server, Portainer Community Edition (CE) is usually the appropriate choice.
Portainer’s official documentation provides separate installation instructions for Community Edition and Business Edition. (Portainer
For this guide, we’ll use:
Portainer Community Edition
Raspberry Pi Requirements
You don’t need an especially powerful Raspberry Pi to run Portainer.
I’d recommend:
| Component | Recommendation |
|---|---|
| Raspberry Pi | Raspberry Pi 4 or 5 |
| RAM | 4GB recommended |
| OS | Raspberry Pi OS 64-bit |
| Storage | SSD recommended |
| Network | Ethernet |
| Docker | Current supported version |
| Portainer | Community Edition |
Portainer itself is relatively lightweight, so the bigger consideration is the number and resource requirements of the Docker containers you’ll run alongside it.
Raspberry Pi OS 64-bit Is Recommended
For a new Raspberry Pi server, use a 64-bit operating system.
This is particularly important because Docker’s current documentation warns that Docker Engine 28 is the final major release supporting Raspberry Pi OS 32-bit (armhf). Starting with Docker Engine 29, new major versions no longer provide packages for Raspberry Pi OS 32-bit. Docker recommends moving to 64-bit ARM where possible. (Docker)
Therefore, for a new Portainer installation in 2026:
Use Raspberry Pi OS 64-bit.
Step 1: Update Raspberry Pi OS
Connect to your Raspberry Pi through SSH or open a terminal.
Run:
sudo apt update
sudo apt full-upgrade -y
Then reboot:
sudo rebootAfter the Raspberry Pi restarts, reconnect.
Step 2: Check Your Raspberry Pi Architecture
Run:
dpkg --print-architectureOn a 64-bit Raspberry Pi OS installation, you should see:
arm64You can also run:
uname -mA typical 64-bit Raspberry Pi installation will report:
aarch64This is what you want for a modern Raspberry Pi Docker server.
Step 3: Install Docker
Portainer requires Docker to already be installed and working.
Portainer’s official documentation recommends having the latest supported Docker version installed before deploying Portainer. (Portainer)
Docker provides official installation instructions for Raspberry Pi OS. Its current documentation recommends using the Docker apt repository rather than relying on unofficial distribution packages. (Docker
Install the prerequisites:
sudo apt update
sudo apt install ca-certificates curl -y
Create the keyring directory:
sudo install -m 0755 -d /etc/apt/keyringsDownload Docker’s official GPG key:
sudo curl -fsSL https://download.docker.com/linux/raspbian/gpg \
-o /etc/apt/keyrings/docker.asc
Make the key readable:
sudo chmod a+r /etc/apt/keyrings/docker.ascAdd the Docker repository:
echo \
  "deb [arch=$(dpkg --print-architecture) signed-by=/etc/apt/keyrings/docker.asc] https://download.docker.com/linux/raspbian \
  $(. /etc/os-release && echo "$VERSION_CODENAME") stable" | \
  sudo tee /etc/apt/sources.list.d/docker.list > /dev/null
Update the package index:
sudo apt updateInstall Docker:
sudo apt install docker-ce docker-ce-cli containerd.io docker-buildx-plugin docker-compose-plugin -yThese steps follow Docker’s current Raspberry Pi OS installation guidance. (Docker
Step 4: Verify Docker
Check the Docker service:
sudo systemctl status dockerYou should see that Docker is active.
Then run:
sudo docker run hello-worldDocker should download the test image and display a confirmation message.
Docker’s official documentation recommends this test to verify that the Docker Engine installation is working. (Docker
Step 5: Allow Your User to Run Docker
By default, you may need sudo before Docker commands.
For example:
sudo docker psYou can optionally add your user to the Docker group:
sudo usermod -aG docker $USERThen log out and back in.
Test:
docker psYou should now be able to run Docker without sudo.
Important security warning
Membership in the Docker group effectively provides highly privileged control over the host.
Don’t add users to the Docker group unless you trust them.
Step 6: Create the Portainer Data Volume
Portainer needs persistent storage for its configuration and database.
Create the Docker volume:
docker volume create portainer_dataPortainer’s official installation instructions use a Docker volume named portainer_data for this purpose. (Portainer
Verify:
docker volume lsYou should see:
portainer_dataStep 7: Install Portainer
Now deploy Portainer CE.
Portainer’s current Linux installation documentation uses the following command:
docker run -d \
  -p 8000:8000 \
  -p 9443:9443 \
  --name portainer \
  --restart=always \
  -v /var/run/docker.sock:/var/run/docker.sock \
  -v portainer_data:/data \
  portainer/portainer-ce:sts
This creates the Portainer Server container and connects it to the local Docker Engine. (Portainer
What Does This Command Do?
Let’s break it down.
-d
Runs Portainer in detached mode.
-dThe container runs in the background.
-p 8000:8000
Exposes Portainer’s TCP tunnel port.
Port 8000 is optional and is primarily needed for Edge Agent functionality. (Portainer
-p 9443:9443
Exposes the Portainer web interface.
This is the primary port you’ll use.
--name portainer
Names the container:
portainer--restart=always
Automatically restarts Portainer after a Docker restart or Raspberry Pi reboot.
Docker socket
-v /var/run/docker.sock:/var/run/docker.sockThis allows Portainer to communicate with the local Docker Engine.
Portainer data
-v portainer_data:/dataStores Portainer’s persistent data in a Docker volume.
Step 8: Check Portainer
Run:
docker psYou should see something similar to:
CONTAINER ID   IMAGE                     STATUS        PORTS
xxxxxxx        portainer/portainer-ce   Up            0.0.0.0:9443->9443/tcp
Portainer should now be running.
Step 9: Open Portainer
Find your Raspberry Pi’s IP address:
hostname -IFor example:
192.168.1.50Open this address in your browser:
https://192.168.1.50:9443Portainer’s current installation documentation uses HTTPS on port 9443 by default. (Portainer
Your browser will probably warn you about the certificate.
That’s expected.
Portainer generates a self-signed SSL certificate by default. (Portainer
Step 10: Create the Portainer Administrator Account
The first page asks you to create your administrator account.
Portainer’s current documentation requires the initial administrator password to be at least 12 characters and meet the listed password requirements. (Portainer
Use:
- A unique username
- A strong password
- A password you don’t reuse elsewhere
Don’t use the same password as your Raspberry Pi account.
Step 11: Connect Portainer to Docker
After creating the administrator account, Portainer’s Environment Wizard should appear.
The local Docker environment should be detected automatically.
Choose:
Get Started
Portainer will then display your Docker environment.
The official documentation says the installation process automatically detects the local environment and allows you to start managing it through Portainer. (Portainer
Your Portainer Dashboard
You should now see the Portainer dashboard.
From here you can access sections such as:
- Containers
- Images
- Networks
- Volumes
- Stacks
- Host information
This becomes your central Docker management interface.
Step 12: Create Your First Container
Let’s test Portainer by deploying a simple container.
From the Portainer dashboard:
Containers → Add container
Give it a name:
nginx-testFor the image:
nginx:alpineConfigure the port:
Host: 8080
Container: 80
Then deploy the container.
You can access it at:
http://192.168.1.50:8080You should see the nginx welcome page.
Step 13: Manage the Container
Once the container is running, Portainer allows you to:
- Stop it
- Start it
- Restart it
- Remove it
- View logs
- Open a console
- Inspect it
- Duplicate it
- Edit configuration
This is where Portainer becomes much more convenient than managing every container manually.
Step 14: View Container Logs
Click the container:
nginx-testThen select:
Logs
You’ll see the container’s output.
This is extremely useful when troubleshooting applications.
For example, if Jellyfin doesn’t start, you can inspect its logs directly from Portainer.
Step 15: Open a Container Console
Portainer also lets you open a terminal inside a container when the image supports it.
This can be useful for troubleshooting.
For example:
Container
   │
   ▼
Console
   │
   ▼
Shell
You can inspect configuration files, processes, permissions, and application behavior.
Step 16: Manage Docker Images
Portainer provides an interface for Docker images.
You can:
- View downloaded images
- Pull images
- Remove unused images
- Inspect image information
For example:
portainer/portainer-ce
nginx
jellyfin/jellyfin
Images are the templates from which containers are created.
Step 17: Manage Docker Volumes
Volumes store persistent application data.
For example:
portainer_datais the volume containing Portainer’s data.
Other applications may use:
jellyfin_config
nextcloud_data
postgres_data
Volumes are extremely important.
Don’t delete a volume just because you’re deleting a container.
A container can usually be recreated from its image, but deleting the associated volume may permanently delete application data.
Step 18: Manage Docker Networks
Portainer also lets you view Docker networks.
Common networks include:
bridge
host
none
You may also create custom networks.
For example:
home-serverThen connect multiple containers to it.
A custom Docker network can allow containers to communicate using container names rather than hard-coded IP addresses.
Step 19: Deploy Docker Compose with Portainer
One of Portainer’s most useful features is Stacks.
A Stack lets you deploy a Docker Compose application.
For example:
services:
  nginx:
    image: nginx:alpine
    container_name: nginx
    restart: unless-stopped
    ports:
      - "8080:80"
In Portainer:
Stacks → Add Stack
Choose:
Web editor
Paste the Compose configuration.
Then click:
Deploy the stack
Portainer will create the required Docker resources.
Why Docker Compose Stacks Matter
As your Raspberry Pi server grows, you may have several containers belonging to the same application.
For example, Nextcloud might use:
Nextcloud
├── Nextcloud
├── MariaDB
└── Redis
A Compose stack allows you to define the entire application in one file.
This makes deployments much easier to reproduce.
Portainer and CasaOS
Since you’re building Raspberry Pi home-server content around applications such as CasaOS, it’s worth understanding the difference.
CasaOS provides a broader home-server interface designed around easy application management.
Portainer focuses specifically on container management.
You can think of them like this:
| Feature | CasaOS | Portainer |
|---|---|---|
| Docker management | Yes | Excellent |
| Container management | Yes | Excellent |
| Docker Compose | Yes | Excellent |
| Home-server dashboard | Excellent | Good |
| File management | Yes | Limited |
| App store | Yes | Templates |
| Advanced Docker control | Moderate | Excellent |
| Beginner friendly | Excellent | Excellent |
If you’re primarily interested in Docker administration, Portainer is an excellent choice.
Can You Run Portainer with CasaOS?
Yes, but consider whether you actually need both.
You can have:
Raspberry Pi
     │
   Docker
     │
 ┌───┴────┐
 │        │
CasaOS  Portainer
 │        │
 └───┬────┘
     │
 Containers
Both can manage Docker.
However, managing the same containers through multiple management interfaces can create confusion.
If you use both, establish a clear workflow.
For example:
CasaOS: simple application installation and home-server dashboard.
Portainer: advanced Docker administration and Compose stacks.
Portainer and Jellyfin
Portainer is useful for managing Jellyfin.
You can see:
jellyfinin your container list and:
- Restart it
- View logs
- Inspect it
- Monitor its status
- Update its image
- Manage its volumes
For your existing Raspberry Pi media-server setup, this makes Portainer a natural addition to the stack.
Portainer and Nextcloud
The same applies to Nextcloud.
A Nextcloud deployment may involve multiple services.
Portainer can give you a centralized view of:
Nextcloud
MariaDB
Redis
and make it easier to inspect container logs and configuration.
Portainer and Pi-hole
If Pi-hole is running in Docker, Portainer can manage it just like any other container.
You can:
Start
Stop
Restart
Logs
Console
Inspect
without opening a terminal.
Portainer and Tailscale
If Tailscale is running as a Docker container, Portainer can manage it as well.
However, networking-related containers often require additional privileges or host networking.
Don’t modify the networking configuration of a working Tailscale deployment without understanding the implications.
Portainer on Raspberry Pi 4 vs Raspberry Pi 5
Portainer itself doesn’t require a Raspberry Pi 5.
Raspberry Pi 4
Good for:
- Portainer
- Pi-hole
- Small Docker deployments
- Lightweight home servers
Raspberry Pi 5
Better for:
- Multiple containers
- Nextcloud
- Jellyfin
- Databases
- Development environments
- Larger home labs
If you’re building a new Raspberry Pi server in 2026, I’d choose the Raspberry Pi 5.
How Much RAM Does Portainer Need?
Portainer itself is lightweight compared with applications such as Nextcloud or databases.
The amount of RAM you need is mostly determined by the containers you plan to run.
For example:
Portainer
    +
Pi-hole
    +
Tailscale
requires relatively little memory.
But:
Portainer
    +
Nextcloud
    +
MariaDB
    +
Redis
    +
Jellyfin
requires significantly more.
For a general-purpose Raspberry Pi home server, 4GB is a good starting point, while 8GB provides more room for additional services.
Use an SSD for Docker
If you’re planning to run many Docker containers, an SSD is strongly recommended.
Docker stores:
- Images
- Container layers
- Volumes
- Logs
- Application databases
A typical Docker installation uses:
/var/lib/dockeron the system disk.
If you’re running many services from a microSD card, storage performance and longevity can become concerns.
A better setup is:
Raspberry Pi 5
      │
      └── NVMe / SSD
              │
          Docker
              │
      ┌───────┼────────┐
      │       │        │
   Portainer Jellyfin Nextcloud
Move Docker Data to an SSD
If you’re building a serious home server, you may eventually want Docker’s data directory on an SSD.
This requires careful planning because Docker stores all of its container and image data there.
Before changing Docker’s data-root:
- Stop containers.
- Back up important volumes.
- Configure the SSD.
- Move the Docker data.
- Update Docker’s configuration.
- Restart Docker.
- Verify every container.
Don’t simply delete /var/lib/docker.
Portainer Security
Portainer provides access to Docker, and Docker itself is highly privileged.
This means Portainer should be treated as an administrative service.
Use a strong password
Your Portainer account controls Docker.
Don’t expose Portainer unnecessarily
If Portainer is only for local administration, don’t forward port 9443 through your router.
Use HTTPS
Portainer uses HTTPS on port 9443 by default and generates a self-signed certificate. (Portainer
Consider Tailscale
You can access Portainer remotely through your private Tailscale network instead of exposing it publicly.
For your Raspberry Pi setup:
Remote Laptop
     │
  Tailscale
     │
     ▼
Raspberry Pi
     │
  Portainer
     │
   Docker
This is an excellent combination.
Can You Use Your Own SSL Certificate?
Yes.
Portainer supports using your own SSL certificate instead of its generated certificate. Its documentation provides configuration options for supplying a certificate and private key to the Portainer container. (Portainer
For example, Portainer can be configured with:
portainer.crt
portainer.key
mounted into the container.
For most local home-server installations, the default HTTPS certificate is sufficient for getting started.
Should Port 9443 Be Open to the Internet?
No, not unless you have a very specific reason and have secured the service appropriately.
Portainer is an administrative interface.
A much better setup is:
Internet
   │
Tailscale / VPN
   │
Raspberry Pi
   │
Portainer
rather than:
Internet
   │
Port 9443
   │
Portainer
Your previous Tailscale on Raspberry Pi article is therefore a natural companion to this guide.
Portainer Backup
Your Portainer configuration is stored in:
portainer_dataCheck it with:
docker volume inspect portainer_dataThe volume contains Portainer’s persistent data.
Back up important Docker data regularly.
However, remember that Portainer itself isn’t your application backup system.
Your important data might live in:
- Nextcloud volumes
- MariaDB volumes
- Jellyfin configuration
- Docker bind mounts
- External storage
Those need their own backup strategy.
Updating Portainer
Portainer is distributed as a Docker image.
A typical update process is:
docker pull portainer/portainer-ce:stsStop the existing container:
docker stop portainerRemove it:
docker rm portainerThen recreate the container using the same volume:
docker run -d \
  -p 8000:8000 \
  -p 9443:9443 \
  --name portainer \
  --restart=always \
  -v /var/run/docker.sock:/var/run/docker.sock \
  -v portainer_data:/data \
  portainer/portainer-ce:sts
Because portainer_data is persistent, your Portainer configuration is retained.
Always review Portainer’s current release and upgrade documentation before performing production upgrades.
Why Persistent Volumes Matter
Imagine you installed Portainer with:
portainer_dataThen removed the container:
docker rm portainerYour Portainer configuration remains because it is stored separately in the Docker volume.
If you instead delete the volume:
docker volume rm portainer_datayou can lose Portainer’s stored configuration.
Therefore:
Container ≠ Data
This is one of the most important concepts to understand when using Docker.
Useful Portainer Docker Commands
Check Portainer:
docker psView Portainer logs:
docker logs portainerFollow logs:
docker logs -f portainerRestart Portainer:
docker restart portainerStop Portainer:
docker stop portainerStart Portainer:
docker start portainerInspect the container:
docker inspect portainerInspect the data volume:
docker volume inspect portainer_dataTroubleshooting Portainer
Portainer doesn’t load
Check:
docker psIf Portainer isn’t running:
docker start portainerThen inspect logs:
docker logs portainerPort 9443 is already in use
Check:
sudo ss -lntp | grep 9443If another application is using the port, you can map a different host port.
For example:
-p 9444:9443Then access:
https://192.168.1.50:9444Portainer Can’t Connect to Docker
The most important volume is:
/var/run/docker.sock:/var/run/docker.sockCheck the container configuration:
docker inspect portainerMake sure the Docker socket is mounted.
Portainer Container Keeps Restarting
Check:
docker logs portainerThen inspect:
docker inspect portainerCommon causes include:
- Incorrect Docker installation
- Permission problems
- Corrupted Portainer data
- Unsupported configuration
- Docker daemon problems
Docker Isn’t Running
Check:
sudo systemctl status dockerIf necessary:
sudo systemctl start dockerThen:
docker psPortainer vs Docker CLI
You don’t have to choose one.
The best approach is to understand both.
Docker CLI
Excellent for:
- Automation
- Scripts
- Troubleshooting
- Documentation
- Advanced administration
Portainer
Excellent for:
- Visual management
- Logs
- Container status
- Compose stacks
- Beginners
- Quick administration
A good Raspberry Pi administrator should be comfortable with both.
Portainer vs CasaOS
This is a particularly relevant comparison for your Raspberry Pi home-server content.
CasaOS
Best when you want:
A simple home-server interface.
Portainer
Best when you want:
Detailed Docker management.
If you’re building a more advanced Docker environment, Portainer is generally the better dedicated container-management tool.
Portainer vs Cockpit
Cockpit is another Linux server administration interface.
Portainer is more focused on containers.
| Feature | Portainer | Cockpit |
|---|---|---|
| Docker management | Excellent | Good |
| Containers | Excellent | Good |
| Compose | Excellent | Varies |
| Linux administration | Limited | Excellent |
| System monitoring | Good | Excellent |
| Home-server Docker | Excellent | Good |
For a Raspberry Pi running many Docker containers, I’d choose Portainer if container management is the priority.
Recommended Raspberry Pi Docker Stack
For the home-server ecosystem you’re building, a powerful setup could look like:
                    Raspberry Pi 5
                           │
                         SSD
                           │
                         Docker
                           │
                     ┌─────┴─────┐
                     │ Portainer │
                     └─────┬─────┘
                           │
       ┌───────────────────┼───────────────────┐
       │                   │                   │
    Jellyfin           Nextcloud            Pi-hole
       │                   │                   │
       └───────────────────┼───────────────────┘
                           │
                    Other Containers
                           │
                   Tailscale / VPN
This gives you:
- Container management
- Media server
- Private cloud
- DNS filtering
- Remote access
all running from one low-power computer.
Is Portainer Worth Installing on Raspberry Pi?
Yes, especially if you’re running multiple Docker containers.
If you only have one container, Portainer isn’t necessary.
But once you start running:
Jellyfin
Nextcloud
Pi-hole
Home Assistant
Tailscale
Uptime Kuma
Portainer becomes much more useful.
The graphical interface makes it easier to understand what’s running and troubleshoot problems.
Final Thoughts
Installing Portainer on a Raspberry Pi is straightforward once Docker is running.
The essential process is:
1. Install Raspberry Pi OS 64-bit
          ↓
2. Install Docker
          ↓
3. Verify Docker
          ↓
4. Create portainer_data
          ↓
5. Install Portainer CE
          ↓
6. Open port 9443
          ↓
7. Create admin account
          ↓
8. Connect to Docker
          ↓
9. Deploy containers
The current Portainer CE installation uses the portainer/portainer-ce:sts image, exposes HTTPS on port 9443, and stores persistent configuration in the portainer_data volume. Port 8000 is optional and is primarily associated with Edge Agent functionality. (Portainer
For a Raspberry Pi home server, I’d pair Portainer with an SSD, Ethernet, Raspberry Pi OS 64-bit, and a reliable backup strategy.
And if you want remote administration, combining Portainer + Tailscale is particularly attractive because you can keep the Docker management interface off the public Internet.
Frequently Asked Questions
Can I install Portainer on Raspberry Pi?
Yes. Portainer CE can run as a Docker container on a Raspberry Pi with a supported Docker installation.
Does Portainer work on Raspberry Pi 5?
Yes. Raspberry Pi 5 is an excellent platform for running Portainer alongside other Docker applications.
Do I need Docker to install Portainer?
Yes. The installation covered in this guide runs Portainer as a Docker container, so Docker must be installed first.
Is Portainer free?
Portainer Community Edition is available for free. Portainer also offers a Business Edition with additional capabilities.
What port does Portainer use?
The current Portainer CE Docker installation uses HTTPS port 9443 for the web interface. Port 8000 is used for the Edge Agent tunnel and is optional for installations that don’t use Edge Agents. (Portainer
Why does Portainer use port 9443 instead of 9000?
Portainer’s current default web interface uses HTTPS on port 9443. Port 9000 is retained only for legacy HTTP scenarios. (Portainer
Can I run Portainer and CasaOS together?
Yes, although both can manage Docker. It’s best to decide which interface you’ll use for particular administration tasks to avoid confusion.
Can Portainer manage Docker Compose?
Yes. Portainer provides Stacks for deploying and managing Compose-based applications.
Can I use Portainer to manage Jellyfin?
Yes. If Jellyfin is running in Docker, Portainer can manage its container, image, logs, volumes, and other Docker configuration.
Should I expose Portainer to the Internet?
Generally, no. Portainer is an administrative interface. For remote access, a VPN such as Tailscale or WireGuard is generally a better architecture than exposing the Portainer management interface directly.
Does Portainer work with ARM64?
Yes. Docker automatically selects an appropriate image variant when a multi-platform image supports the host architecture. Docker documents this behavior for multi-platform images, including ARM64 systems. (Docker
Recommended Links
- Install Docker on Raspberry Pi
- Install CasaOS on Raspberry Pi
- Install Tailscale on Raspberry Pi
- Raspberry Pi VPN Server with WireGuard
- Install Jellyfin on Raspberry Pi
- Install Nextcloud on Raspberry Pi
- Install Pi-hole on Raspberry Pi
- Best SBC for Home Assistant
- Best Single Board Computers for Home Servers
- How to Build a Home Server with a Single Board Computer