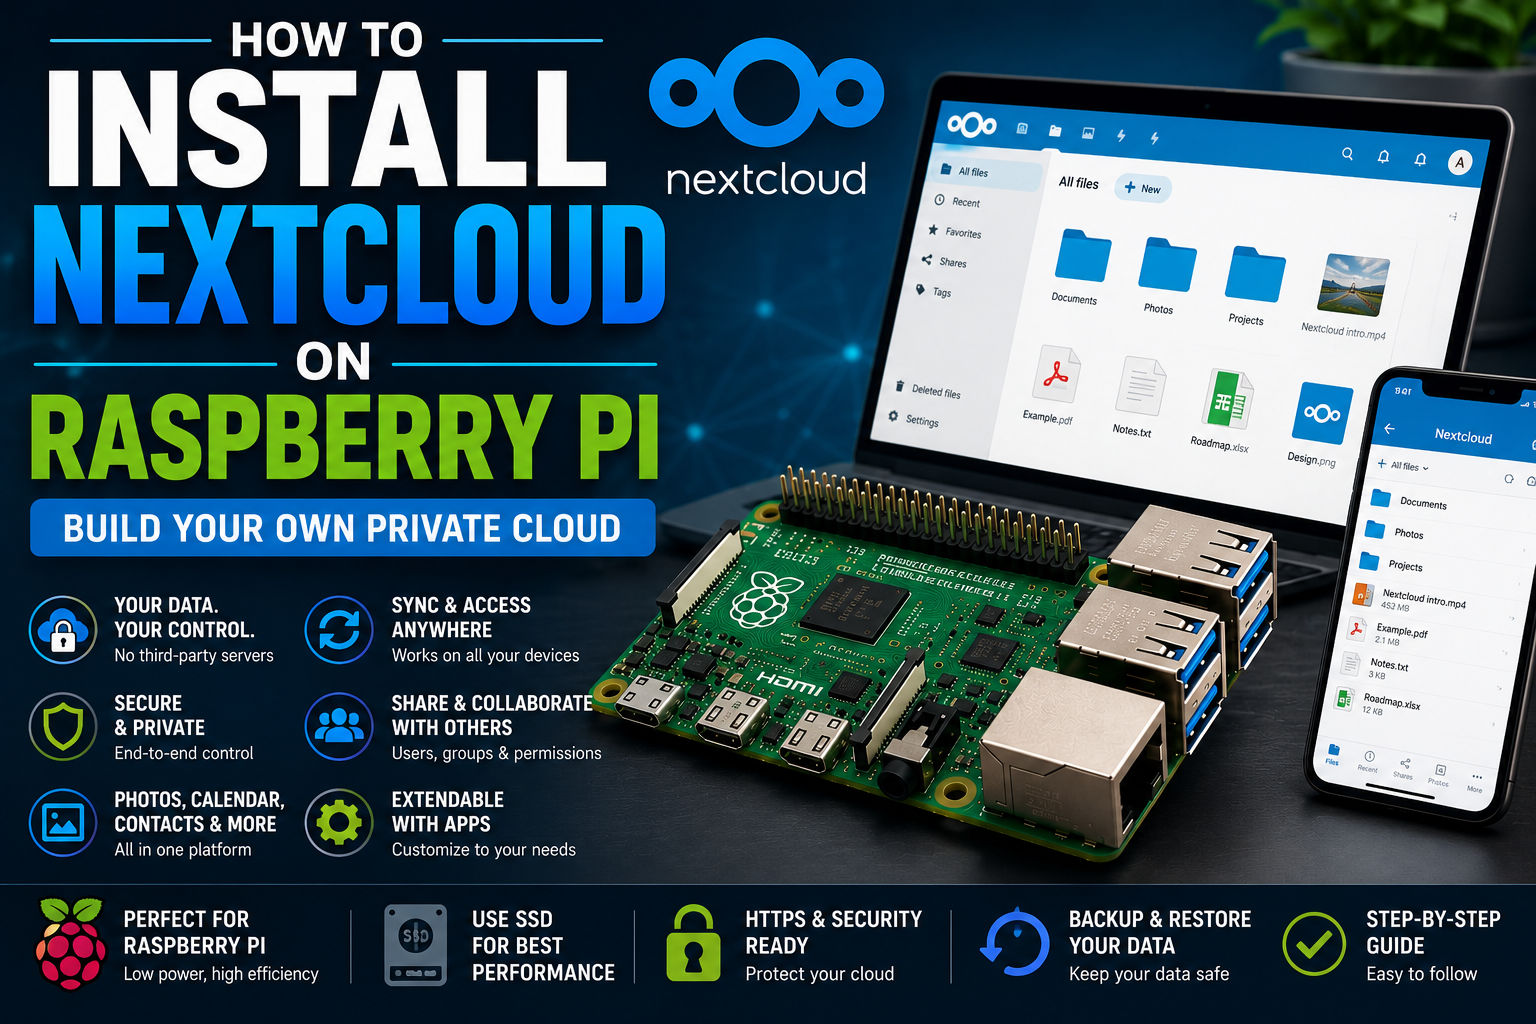
Want to turn your Raspberry Pi into your own private cloud?
Nextcloud lets you store, synchronize, and access files from your computers and mobile devices without relying entirely on services such as Google Drive or Dropbox. You can also use it for calendars, contacts, photo management, file sharing, collaboration, and other self-hosted services.
A Raspberry Pi is a surprisingly capable platform for a small personal Nextcloud server. In fact, Nextcloud’s own documentation specifically notes that Nextcloud can run on a simple two-user Raspberry Pi installation, although larger deployments require considerably more resources.
In this guide, we’ll install Nextcloud on a 64-bit Raspberry Pi OS/Debian-based system, use an SSD for storage, configure the database and Redis, and finish with security, HTTPS, backups, and performance recommendations.
Important: There are several ways to install Nextcloud. For Raspberry Pi users, you can use the community NextcloudPi project or a Docker-based deployment. Nextcloud’s documentation also describes a traditional Linux installation. NextcloudPi is particularly convenient for Raspberry Pi, while Docker is a good choice if you’re already using CasaOS.
What Is Nextcloud?
Nextcloud is an open-source platform for self-hosting your files and collaboration services.
You can use it for:
- Cloud file storage
- File synchronization
- Photo storage
- Calendar synchronization
- Contacts
- File sharing
- Document collaboration
- Notes
- Tasks
- Video calls
- Mobile backups
- Extensions and apps
A typical Raspberry Pi installation looks like this:
                    Internet
                       │
                       │ HTTPS
                       ▼
                 ┌───────────┐
                 │ Nextcloud │
                 │ Raspberry │
                 │    Pi     │
                 └─────┬─────┘
                       │
             ┌─────────┼─────────┐
             │         │         │
           SSD       Redis    Database
             │
        Your Files
             │
       ┌─────┼─────┐
       │     │     │
      PC   Phone  Tablet
Why Run Nextcloud on a Raspberry Pi?
A Raspberry Pi makes an excellent low-power personal cloud server for a small number of users.
Advantages
- Low power consumption
- Small physical footprint
- Affordable
- Quiet
- Excellent Linux support
- Gigabit Ethernet
- USB 3 storage
- Large community
- Can run additional services
It’s particularly attractive if you already have a Raspberry Pi running other home-server applications.
For example:
Raspberry Pi 5
      │
    Docker
      │
 ┌────┼──────────────┐
 │    │              │
Nextcloud Jellyfin  Pi-hole
 │
 └── External SSD
However, don’t underestimate storage and backup requirements. Your files are much more valuable than the Raspberry Pi itself.
Raspberry Pi Requirements
For a new installation, I’d recommend:
| Component | Recommendation |
|---|---|
| Raspberry Pi | Raspberry Pi 5 |
| RAM | 4GB minimum |
| Storage | SSD |
| Network | Gigabit Ethernet |
| OS | 64-bit Raspberry Pi OS |
| Database | MariaDB or PostgreSQL |
| Cache | Redis |
| Power | Reliable PSU |
| Backup | External drive/NAS/cloud |
Nextcloud’s current documentation strongly recommends a 64-bit CPU, operating system, and PHP runtime. It also states that memory requirements vary according to users, apps, files, and server activity.
Why You Should Use an SSD
Although Nextcloud can technically run from a microSD card, I strongly recommend using an SSD.
Nextcloud constantly performs:
- Database operations
- File operations
- Thumbnail generation
- Metadata updates
- Synchronization
- Background jobs
An SSD provides considerably better performance and is a more appropriate storage medium for a server.
A good setup is:
Raspberry Pi 5
     │
     ├── SSD → Operating System
     │
     ├── SSD/HDD → Nextcloud Data
     │
     └── Backup Drive → Backups
You can use one large SSD for everything, but keeping an independent backup is much more important than adding more storage.
Before You Start
Make sure you have:
- Raspberry Pi
- Raspberry Pi OS 64-bit
- SSD
- Ethernet connection
- SSH access
- Router access
- A stable local IP address
- A domain name if you want remote HTTPS access
For a first installation, I recommend getting Nextcloud working inside your local network first.
Don’t expose it to the Internet until the installation and security configuration are complete.
Step 1: Install Raspberry Pi OS
Install the latest 64-bit Raspberry Pi OS using Raspberry Pi Imager.
For a dedicated server, Raspberry Pi OS Lite 64-bit is a good choice.
During installation configure:
- Hostname
- Username
- Password
- SSH
- Ethernet/Wi-Fi
After booting, connect to the Raspberry Pi.
Step 2: Find the Raspberry Pi IP Address
Run:
hostname -IYou might see:
192.168.1.50You can then connect using SSH:
ssh [email protected]Step 3: Update the Operating System
Before installing anything:
sudo apt update
sudo apt full-upgrade -y
Reboot:
sudo rebootReconnect after the Raspberry Pi starts.
Step 4: Configure a Stable IP Address
Your Nextcloud server should have a stable IP address.
I recommend creating a DHCP reservation on your router.
For example:
Raspberry Pi
192.168.1.50
Your router will then always assign:
192.168.1.50to the Raspberry Pi.
This is particularly important because you’ll use the IP address to access Nextcloud locally and potentially configure DNS and reverse-proxy rules later.
Step 5: Choose Your Installation Method
There are three approaches worth considering.
Option 1: NextcloudPi
Best for:
Raspberry Pi beginners
NextcloudPi is a community project specifically designed to make Nextcloud easier to deploy on Raspberry Pi and other supported boards. It includes Nextcloud, Apache, PHP, MariaDB, Redis, and configuration tools.
Option 2: Docker
Best for:
CasaOS and home-lab users
Docker makes it easier to manage Nextcloud alongside other applications.
Option 3: Traditional Linux Installation
Best for:
Administrators who want maximum control
Nextcloud’s official documentation provides a traditional installation using a Linux web server, PHP, and a database.
For this guide, we’ll focus on a traditional Raspberry Pi installation, because it teaches you how the components actually work.
Step 6: Install Apache
Nextcloud supports Apache with mod_php or PHP-FPM, as well as nginx with PHP-FPM.
Install Apache:
sudo apt install apache2 -yCheck the service:
sudo systemctl status apache2If everything is working, visit:
http://192.168.1.50You should see the Apache default page.
Step 7: Install MariaDB
Nextcloud requires a supported database for a normal production installation. Nextcloud currently supports MariaDB and PostgreSQL among its recommended database choices. SQLite is intended primarily for testing and very small/minimal instances.
Install MariaDB:
sudo apt install mariadb-server mariadb-client -yEnable it:
sudo systemctl enable mariadb
sudo systemctl start mariadb
Check:
sudo systemctl status mariadbStep 8: Secure MariaDB
Run:
sudo mariadb-secure-installationFollow the prompts.
Remove unnecessary anonymous access and test databases, and configure appropriate database security.
Step 9: Create the Nextcloud Database
Open MariaDB:
sudo mariadbCreate the database:
CREATE DATABASE nextcloud CHARACTER SET utf8mb4 COLLATE utf8mb4_general_ci;Create a dedicated database user:
CREATE USER 'nextclouduser'@'localhost' IDENTIFIED BY 'YOUR_STRONG_PASSWORD';Grant permissions:
GRANT ALL PRIVILEGES ON nextcloud.* TO 'nextclouduser'@'localhost';Apply changes:
FLUSH PRIVILEGES;Exit:
EXIT;Use a strong, unique password.
Step 10: Install PHP
Nextcloud requires a supported PHP version.
The current Nextcloud 34 documentation lists PHP 8.3 and 8.4 as supported versions, with PHP 8.5 recommended in its current requirements.
On Raspberry Pi OS, the exact PHP version available through the distribution repositories can vary.
Check your version:
php -vInstall PHP and the required modules:
sudo apt install php php-mysql php-gd php-curl php-zip php-xml php-mbstring php-intl php-bcmath php-gmp php-imagick php-apcu php-redis libapache2-mod-php -yThen restart Apache:
sudo systemctl restart apache2Step 11: Install Redis
Redis is highly recommended for caching and transactional file locking.
Install it:
sudo apt install redis-server php-redis -yEnable it:
sudo systemctl enable redis-server
sudo systemctl start redis-server
Check:
sudo systemctl status redis-serverStep 12: Download Nextcloud
Go to a temporary directory:
cd /tmpDownload the latest stable Nextcloud archive from the official download server.
For example:
wget https://download.nextcloud.com/server/releases/latest.tar.bz2Extract it:
tar -xjf latest.tar.bz2Move it to Apache’s web directory:
sudo mv nextcloud /var/www/Step 13: Configure File Ownership
Set the correct ownership:
sudo chown -R www-data:www-data /var/www/nextcloudThis allows Apache/PHP to access the Nextcloud installation.
Step 14: Create the Data Directory
I recommend keeping your Nextcloud data outside the web root.
For example:
sudo mkdir -p /mnt/nextcloud-dataSet permissions:
sudo chown -R www-data:www-data /mnt/nextcloud-dataIf your SSD is mounted somewhere else, use that path instead.
Step 15: Configure Apache
Create a virtual host:
sudo nano /etc/apache2/sites-available/nextcloud.confAdd:
<VirtualHost *:80>
    ServerName cloud.example.com

    DocumentRoot /var/www/nextcloud

    <Directory /var/www/nextcloud/>
        Require all granted
        AllowOverride All
        Options FollowSymLinks MultiViews
    </Directory>

    TransferLog /var/log/apache2/nextcloud_access.log
    ErrorLog /var/log/apache2/nextcloud_error.log
</VirtualHost>
Replace:
cloud.example.comwith your domain.
If you’re only testing locally, you can use the Raspberry Pi’s IP address or local hostname instead.
Step 16: Enable Apache Modules
Enable the required modules:
sudo a2enmod rewrite
sudo a2enmod headers
sudo a2enmod env
sudo a2enmod dir
sudo a2enmod mime
Then enable the site:
sudo a2ensite nextcloud.confDisable the default site if desired:
sudo a2dissite 000-default.confRestart Apache:
sudo systemctl restart apache2Step 17: Open the Nextcloud Installer
From a computer on your network, visit:
http://192.168.1.50or:
http://cloud.example.comYou should see the Nextcloud installation screen.
You’ll need to enter:
Administrator account
Create:
- Username
- Password
Database
Select:
MySQL/MariaDB
Enter:
Database user:
nextclouduser

Database password:
YOUR_STRONG_PASSWORD

Database name:
nextcloud

Database host:
localhost
For the data directory:
/mnt/nextcloud-dataThen click:
Install
Step 18: Complete the Installation
Nextcloud will create its configuration and database tables.
Depending on your Raspberry Pi and storage, this can take several minutes.
After installation you’ll arrive at the Nextcloud dashboard.
Congratulations—you now have your own private cloud.
Step 19: Configure Redis
Open:
sudo nano /var/www/nextcloud/config/config.phpAdd:
'memcache.local' => '\\OC\\Memcache\\APCu',
'memcache.locking' => '\\OC\\Memcache\\Redis',
'redis' => [
    'host' => '/var/run/redis/redis-server.sock',
    'port' => 0,
],
The exact Redis socket path can vary depending on your distribution.
Check it with:
sudo find /var/run/redis -type sIf your Redis installation uses a TCP socket instead, configure the appropriate address.
Step 20: Configure Background Jobs
Nextcloud needs background jobs for tasks such as:
- Cleanup
- Notifications
- File scanning
- Maintenance
- App tasks
For a serious installation, use Cron rather than relying on AJAX-triggered background jobs.
Edit the web server user’s crontab:
sudo crontab -u www-data -eAdd:
*/5 * * * * php -f /var/www/nextcloud/cron.phpThis runs the Nextcloud background jobs every five minutes.
Step 21: Configure HTTPS
If your Nextcloud server will be accessible from the Internet, HTTPS is essential.
You can use Let’s Encrypt with Certbot.
Install Certbot:
sudo apt install certbot python3-certbot-apache -yThen:
sudo certbot --apacheFollow the prompts.
Certbot can configure Apache and obtain a certificate for your domain.
Your Nextcloud URL should eventually look like:
https://cloud.example.comDo not expose a Nextcloud installation publicly over plain HTTP.
Step 22: Configure Your Domain
You’ll need DNS pointing to your home connection if you’re hosting Nextcloud publicly.
For example:
cloud.example.com
        │
        ▼
Your public IP
        │
        ▼
Router
        │
        ▼
Raspberry Pi
        │
        ▼
Nextcloud
You’ll typically create an A record for your hostname.
If your ISP changes your public IP, you may also need a dynamic DNS solution.
Step 23: Configure Router Port Forwarding
If you’re hosting Nextcloud from home and want remote access, your router will generally need to forward:
TCP 80
TCP 443
to the Raspberry Pi or reverse proxy.
However, opening ports to the Internet increases your attack surface.
For many home users, a VPN or secure tunnel can be a better solution.
Step 24: Configure Trusted Domains
Nextcloud only allows access through configured trusted domains.
Edit:
sudo nano /var/www/nextcloud/config/config.phpYou’ll find:
'trusted_domains' =>
array (
    0 => 'localhost',
),
Add your IP and domain:
'trusted_domains' =>
array (
    0 => 'localhost',
    1 => '192.168.1.50',
    2 => 'cloud.example.com',
),
Don’t add arbitrary domains.
Step 25: Configure File Storage
If you have a large media collection, use an external SSD or HDD.
For example:
/mnt/nextcloud-dataYou can create folders such as:
Documents
Photos
Videos
Backups
Shared
Nextcloud manages the actual storage structure inside the data directory, so users should normally access files through Nextcloud rather than manually modifying its internal data directories.
Step 26: Install the Nextcloud Desktop Client
Nextcloud provides desktop clients for:
- Windows
- macOS
- Linux
The official clients can synchronize files between your computer and your Nextcloud server.
After installation, enter:
https://cloud.example.comThen sign in.
Select which folders you want synchronized.
Step 27: Install the Mobile App
Nextcloud also provides mobile applications.
You can use them to:
- Access files
- Upload photos
- Download documents
- Synchronize content
- Access shared files
This makes your Raspberry Pi-based Nextcloud server function much more like a commercial cloud-storage platform.
Automatic Photo Backup
One of the most useful Raspberry Pi + Nextcloud projects is automatic phone photo backup.
Your phone can upload photos to your own Nextcloud server:
Phone
  │
  │ Wi-Fi / Internet
  ▼
Nextcloud
  │
  ▼
SSD
  │
  ▼
Your photo library
This can be an excellent alternative to relying exclusively on Google Photos or iCloud.
Nextcloud Performance Optimization
A Raspberry Pi can run Nextcloud well, but optimization matters.
Use an SSD
This is probably the most important hardware recommendation.
Use Ethernet
Gigabit Ethernet is preferable to Wi-Fi.
Use Redis
Redis improves caching and file locking.
Enable PHP OPcache
OPcache improves PHP performance by caching compiled PHP scripts.
Check that OPcache is enabled:
php -m | grep OPcacheUse Cron
Cron is preferable for regular background jobs.
Avoid unnecessary apps
Every additional Nextcloud app consumes resources.
Only install what you actually need.
How Much RAM Does Nextcloud Need?
Nextcloud’s current documentation says the minimum memory requirement is 128 MB RAM per process, while it recommends 512 MB per process. Actual memory requirements depend on users, apps, files, and activity.
For a Raspberry Pi:
2GB
Suitable for a very small installation with modest expectations.
4GB
A good choice for a personal cloud.
8GB
Useful if you’re running Nextcloud alongside multiple services.
For a new Raspberry Pi home server, I’d choose 4GB or 8GB.
Can You Run Nextcloud on Raspberry Pi 5?
Yes.
Nextcloud’s documentation explicitly states that it can run on a simple Raspberry Pi deployment, and the community NextcloudPi project has released Raspberry Pi 5 support.
The Raspberry Pi 5 is a particularly good choice because of its improved CPU performance, faster I/O, and USB 3 connectivity.
Can You Run Nextcloud on Raspberry Pi 4?
Yes.
The NextcloudPi project provides Raspberry Pi 4 images, and Nextcloud itself supports ARM-based Raspberry Pi installations when the operating system and software requirements are satisfied.
For a personal cloud with a small number of users, a Raspberry Pi 4 can still be useful.
NextcloudPi vs Manual Installation
NextcloudPi deserves special consideration if your goal is simply to get a working Nextcloud server running quickly.
NextcloudPi packages a number of components together, including:
- Nextcloud
- Apache
- PHP
- MariaDB
- Redis
- Configuration tools
The project specifically targets Raspberry Pi and other ARM boards.
Choose NextcloudPi if:
- You’re new to Linux
- You want a guided setup
- You’re using Raspberry Pi
- You want integrated configuration tools
Choose manual installation if:
- You want maximum control
- You’re learning Linux administration
- You need a custom Apache/nginx configuration
- You want to understand every component
Nextcloud on Docker
If you’ve already followed our Install CasaOS on Raspberry Pi guide, Docker may be your preferred approach.
Nextcloud’s documentation lists a community Docker image as one of the available installation methods, while noting that community options aren’t officially supported by Nextcloud GmbH.
A Docker-based architecture might look like:
Raspberry Pi 5
      │
    Docker
      │
 ┌────┼───────────────┐
 │    │               │
Nextcloud MariaDB   Redis
 │
 └── SSD Storage
This approach works particularly well when you’re running several applications on the same Raspberry Pi.
Nextcloud with CasaOS
If you already use CasaOS, Nextcloud is a natural addition.
For example:
Raspberry Pi 5
       │
     CasaOS
       │
 ┌─────┼────────────┐
 │     │            │
Nextcloud Jellyfin Pi-hole
 │
 └── External SSD
This gives you a small but powerful home server.
You could potentially combine:
- Nextcloud → private cloud
- Jellyfin → media server
- Pi-hole → DNS filtering
- Home Assistant → smart home
- Vaultwarden → password manager
The limiting factor will ultimately be the Raspberry Pi’s CPU, RAM, storage, and network capacity.
Security Recommendations
A public Nextcloud server should be treated like any other Internet-facing server.
Use HTTPS
Never use plain HTTP for remote access.
Use strong passwords
Especially for administrator accounts.
Enable two-factor authentication
Nextcloud supports multiple authentication and security options.
Keep Nextcloud updated
Updates frequently include security fixes.
Keep Raspberry Pi OS updated
Run:
sudo apt update
sudo apt full-upgrade
regularly.
Don’t expose unnecessary services
Only expose what you actually need.
Protect SSH
Use SSH keys and disable password authentication when appropriate.
Use a firewall
For example, you can use UFW:
sudo apt install ufw -yThen allow SSH and web traffic as appropriate:
sudo ufw allow 22/tcp
sudo ufw allow 80/tcp
sudo ufw allow 443/tcp
Enable it:
sudo ufw enableMake sure you understand your SSH configuration before enabling a firewall remotely.
Back Up Your Nextcloud Server
This is one of the most important sections of the entire guide.
A Nextcloud backup should include at least:
- Database
- Nextcloud configuration
- User data
- Important application data
Your database contains important information about the files and users.
For example:
Nextcloud Backup
│
├── Database
├── config.php
├── User files
└── Application data
Having your files on a second drive isn’t enough if your database is lost.
And having RAID isn’t a substitute for backups.
How Much Storage Do You Need?
It depends entirely on what you’re storing.
Basic documents
256GB–512GB may be enough.
Photos
1TB or more can be useful.
Videos
Several terabytes may be required.
For a growing personal cloud, I’d recommend starting with at least a 1TB SSD if your budget permits.
You can expand storage later.
Common Problems
“Trusted domain” error
Add the hostname or IP address to:
config/config.phpunder:
'trusted_domains'Nextcloud is slow
Check:
- SSD performance
- RAM
- CPU usage
- Redis
- OPcache
- Background jobs
- Database performance
File synchronization fails
Check:
- Available disk space
- Permissions
- Network connectivity
- Client logs
- Nextcloud logs
Photos upload slowly
Check:
- Wi-Fi
- Internet upload speed
- Raspberry Pi storage
- CPU usage
- Reverse proxy configuration
Database errors
Check MariaDB:
sudo systemctl status mariadbCheck Nextcloud logs through the administration interface or its log files.
Useful Commands
Check Apache:
sudo systemctl status apache2Check MariaDB:
sudo systemctl status mariadbCheck Redis:
sudo systemctl status redis-serverCheck disk usage:
df -hCheck memory:
free -hCheck CPU load:
uptimeCheck Raspberry Pi IP:
hostname -ICheck Nextcloud files:
ls -la /var/www/nextcloudIs Raspberry Pi Good for Nextcloud?
For a personal cloud or small household, yes.
It’s especially attractive if you want:
- Private file storage
- Automatic phone photo backups
- File synchronization
- Calendar synchronization
- Contact synchronization
- A low-power server
- A self-hosted alternative to commercial cloud services
It’s less appropriate for:
- Large organizations
- Hundreds of users
- Heavy collaborative workloads
- Large-scale video conferencing
- High-traffic public services
Nextcloud is highly scalable, but a Raspberry Pi isn’t the right hardware for a large deployment.
Raspberry Pi 5 vs VPS for Nextcloud
You could also run Nextcloud on a VPS.
Raspberry Pi
Advantages:
- You own the hardware
- Low operating cost
- Local storage
- Excellent privacy
- No monthly server rental
Disadvantages:
- Home Internet dependency
- Power outages
- Upload bandwidth limitations
- You manage the hardware
- Backup responsibility
VPS
Advantages:
- Data center connectivity
- Public IP
- Better uptime
- Easier remote access
- Scalable resources
Disadvantages:
- Monthly cost
- Storage can become expensive
- You still manage the server
- Provider dependency
For a personal cloud primarily used at home, a Raspberry Pi is a compelling option.
Final Recommendation
If you’re building a Raspberry Pi home server in 2026, Nextcloud is one of the most useful applications you can install.
For the best experience, I’d use:
Raspberry Pi 5
      │
      ├── 4GB or 8GB RAM
      │
      ├── 64-bit Raspberry Pi OS
      │
      ├── SSD
      │
      ├── Gigabit Ethernet
      │
      ├── MariaDB/PostgreSQL
      │
      └── Redis
             │
          Nextcloud
For beginners, NextcloudPi is worth considering because it packages much of the stack and specifically targets Raspberry Pi. For users already running CasaOS, Docker is another convenient option. For administrators who want full control, a traditional Linux installation gives you the most flexibility.
The most important thing isn’t simply getting Nextcloud installed.
It’s making sure the server is:
Fast + Secure + Backed Up + Updated.
Frequently Asked Questions
Can I install Nextcloud on a Raspberry Pi?
Yes. Nextcloud can run on Raspberry Pi hardware, and the official documentation explicitly mentions Raspberry Pi deployments.
Is Raspberry Pi 5 good for Nextcloud?
Yes. Raspberry Pi 5 is a strong choice for a small personal Nextcloud server, particularly when paired with an SSD and Ethernet.
Should I use an SSD?
Yes. An SSD is strongly recommended over a microSD card for a continuously running Nextcloud server.
Can I use Nextcloud with CasaOS?
Yes. A Docker-based Nextcloud installation fits well into a CasaOS home-server environment.
Can I access Nextcloud from outside my home?
Yes, but you should configure HTTPS and secure remote access properly.
Does Nextcloud work with Android and iPhone?
Yes. Nextcloud provides mobile applications for supported Android and iOS versions.
Is Nextcloud free?
The Nextcloud server software is open source and can be self-hosted without paying a software subscription.
Is Nextcloud better than Google Drive?
It depends on your priorities. Nextcloud provides significantly more control because you host the server yourself, but you also become responsible for security, maintenance, backups, and availability.
Recommended links
- Best Single Board Computers for Home Servers
- How to Build a Home Server with a Single Board Computer
- Install CasaOS on Raspberry Pi
- CasaOS vs OpenMediaVault
- Install Jellyfin on Raspberry Pi
- Install Pi-hole on Raspberry Pi
- Best SBC for Home Assistant
- Best Operating Systems for Single Board Computers
- How to Install Linux on a Single Board Computer